WhatTheClip is designed for active copy-and-paste work: recover something you copied a moment ago, keep repeat material in an App Profile, and return to the task without searching through windows.
This guide uses a harmless text clipping. Do the same for your first test—never use a password, access code, or private customer detail as demonstration content.
For the shorter visual overview, see how WhatTheClip works.
Before you start
WhatTheClip supports Apple silicon Macs running macOS 14 or later. Open the installed app from Applications before granting macOS approvals, so macOS can associate them with the correct app identity.
You can begin with history alone. App Profiles, global shortcuts, and automatic paste are optional layers you can enable once the basic workflow feels right.
1. Capture and recover a recent clipboard item
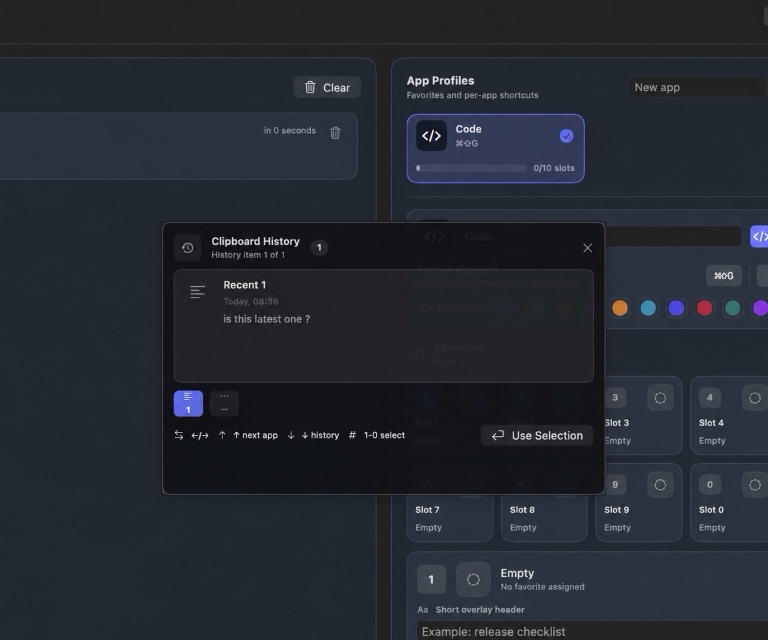
Copy a harmless phrase in a normal Mac app. The dashboard adds it to Clipboard History, with the newest copies first.
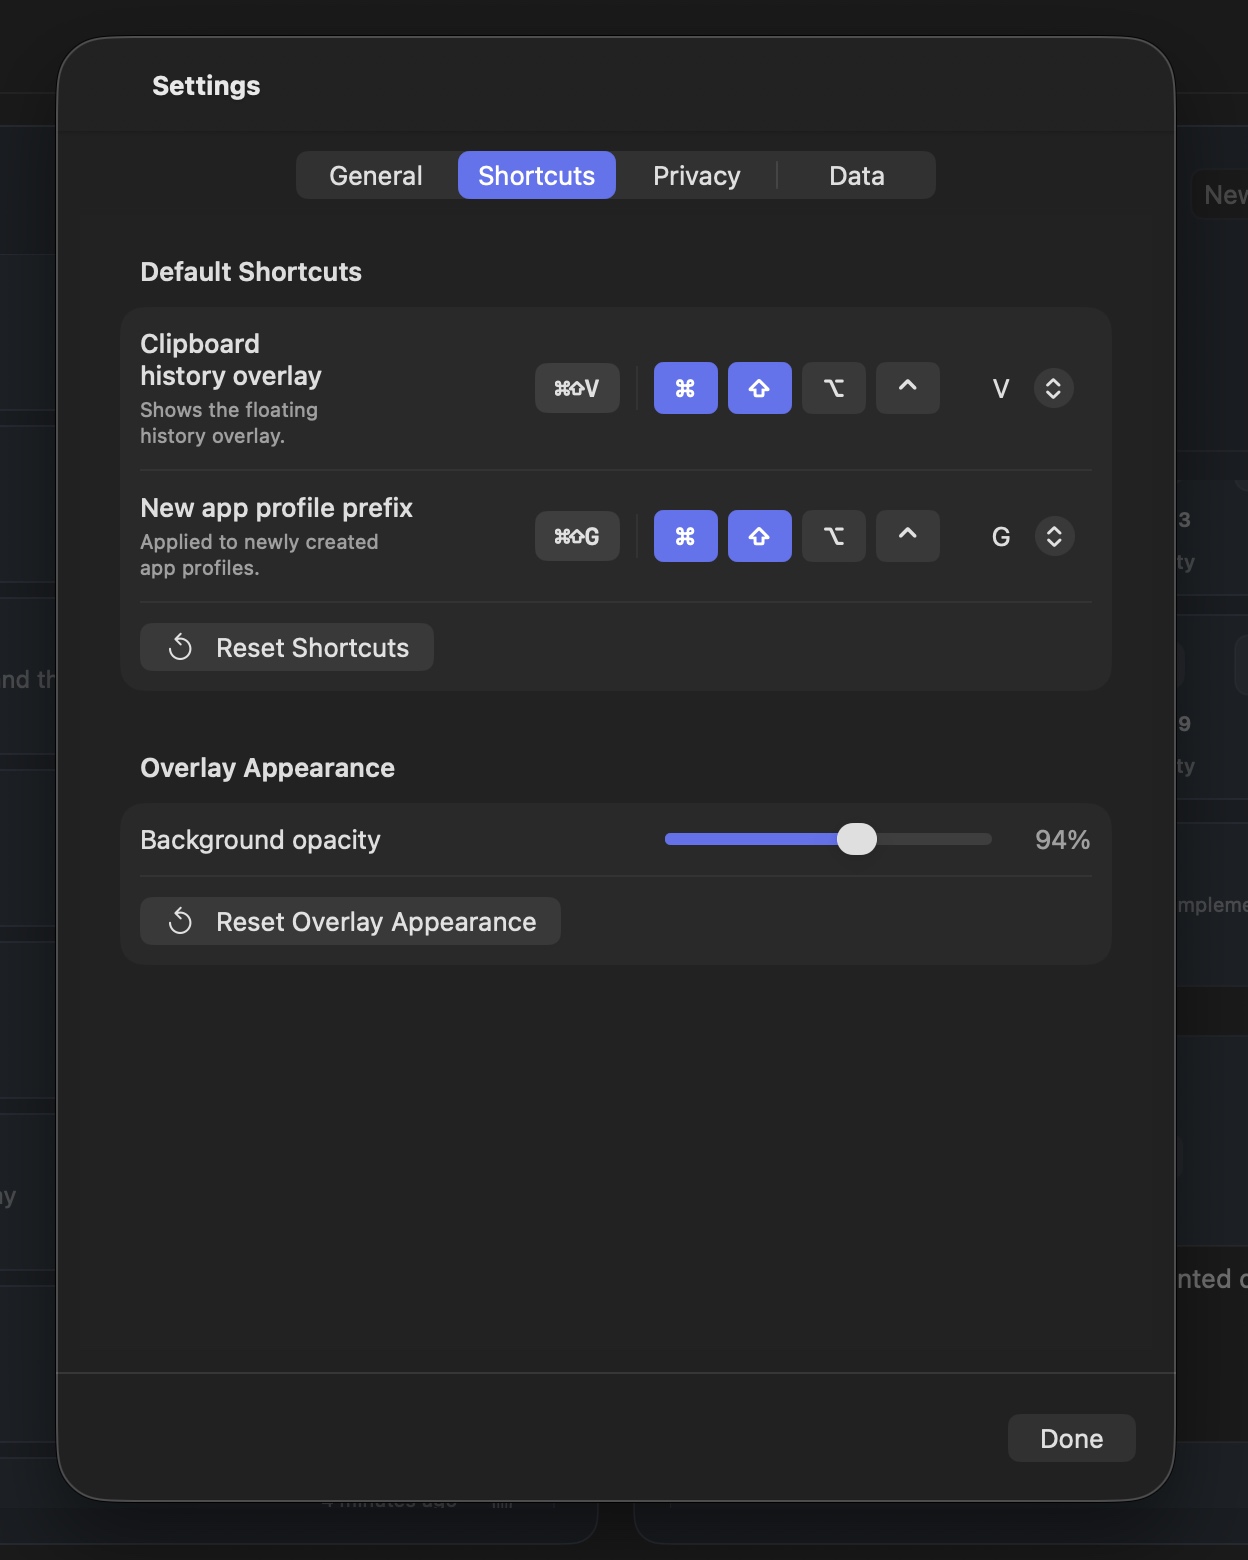
Open the history overlay with your configured shortcut. The default shown in Settings is Command-Shift-V. Select a history item, then continue in the app that was active before the overlay opened.
Use history for recent work
Recent history is useful for an item you just copied and then replaced. It is intentionally bounded, so keep original documents and important source material in their proper long-term location.
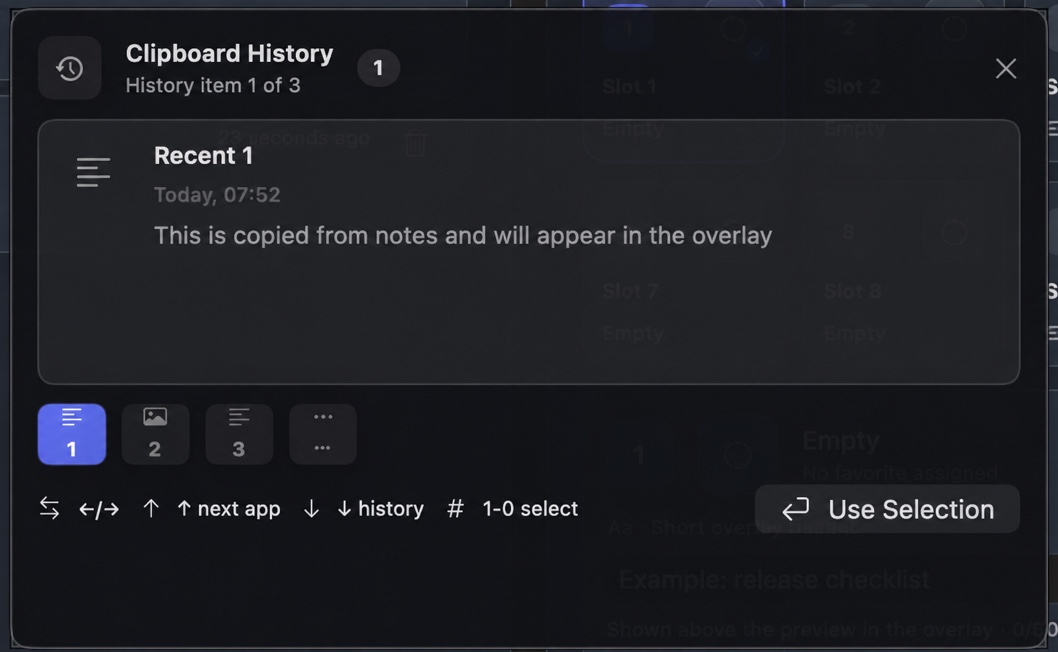
If an automatic paste does not land in the destination, the selection may still be ready on the clipboard for a manual Command-V. Use the overlay and paste troubleshooting guide to check each stage separately.
2. Organise repeat material in an App Profile
Use recent history for recovery. Use an App Profile for material you deliberately reuse: a support reply, project link, coding snippet, address, or approved wording.
Create a profile, choose a name and icon, then assign its numbered favourite slots. Profiles keep work for different contexts separate instead of mixing every saved item into one list.
Save deliberate favourites
Each numbered slot belongs to its App Profile. Start with the few things you use repeatedly; favourites are practical working material, not a replacement for backup or document storage.
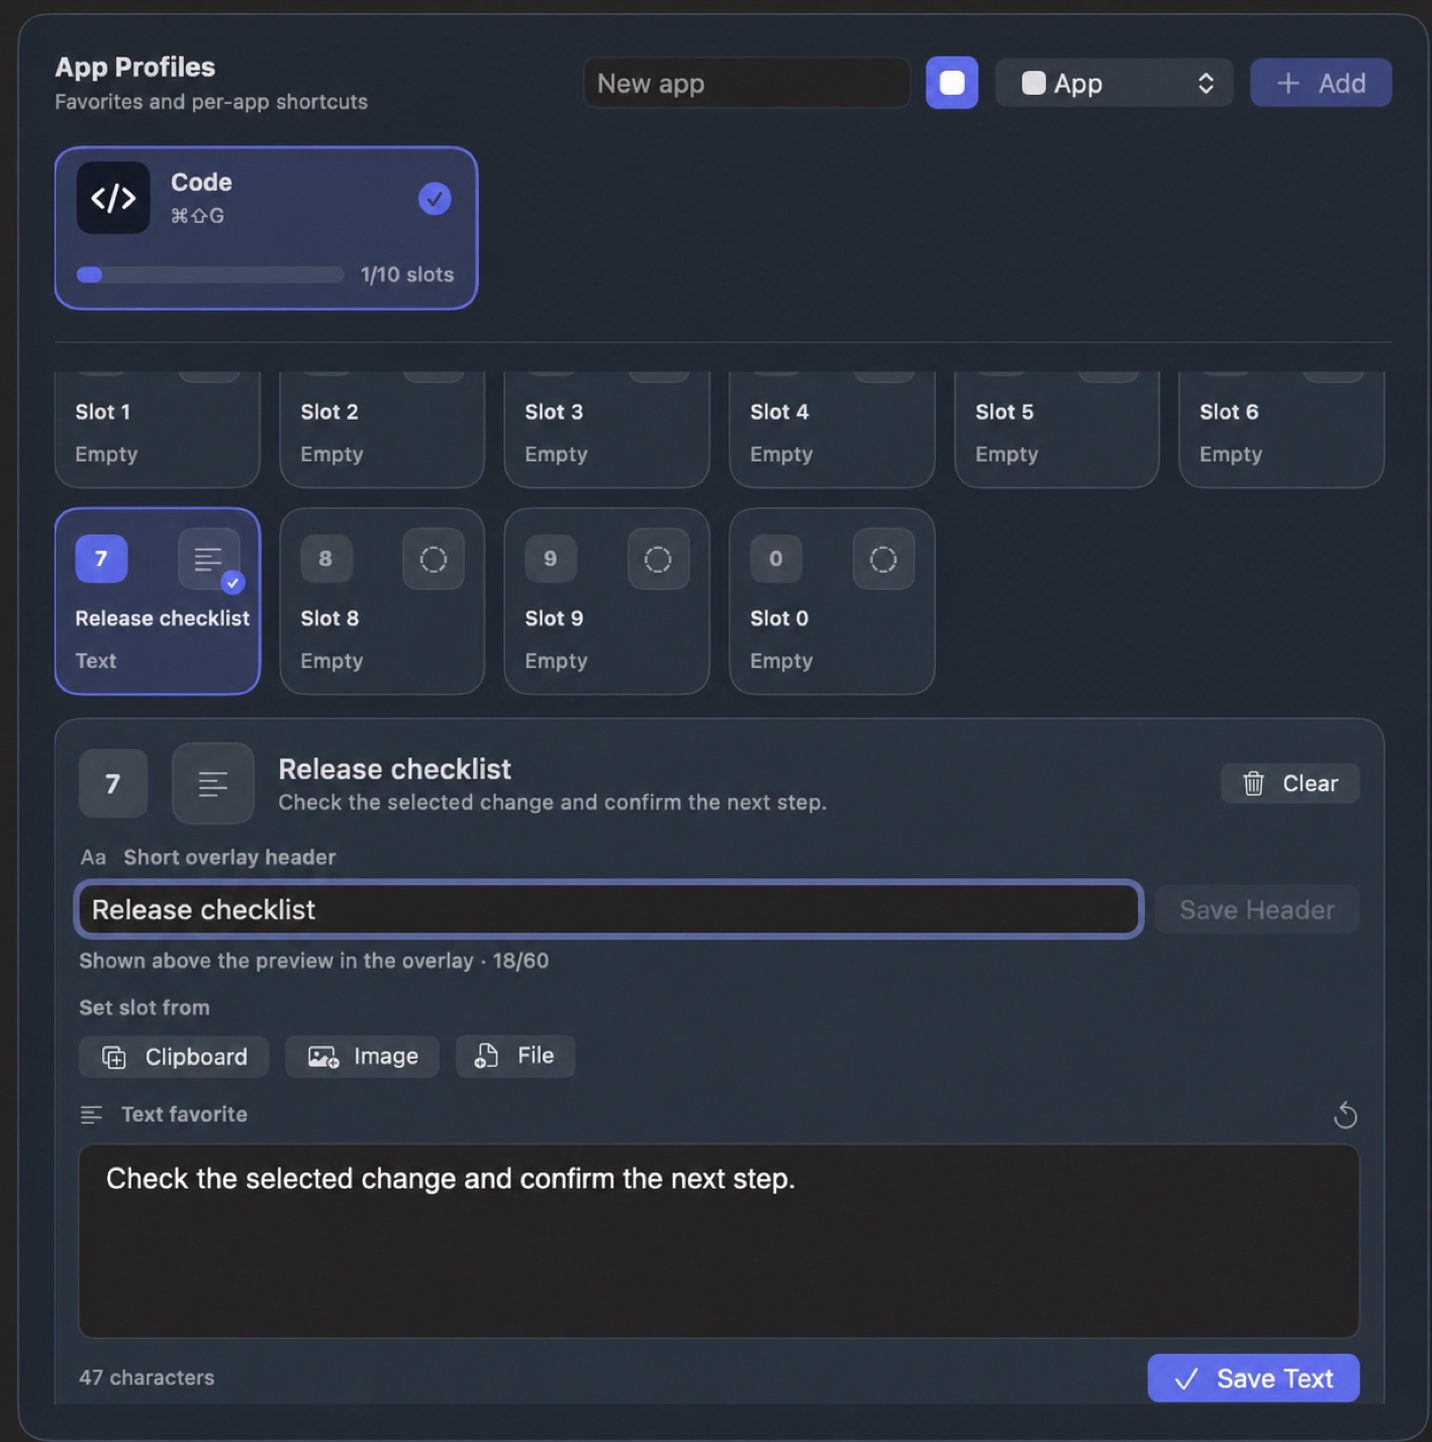
The App Profile workflow guide has more examples of how to separate reusable material by task.
3. Check your shortcut setup
Open Settings → Shortcuts. The clipboard-history overlay shortcut opens recent history, and the new App Profile prefix is applied when you create profiles.
Choose a combination you can remember and that does not conflict with another app. If you do not want global keyboard controls, you can keep them disabled and use the dashboard instead.
Keep shortcuts intentional
A shortcut should make your workflow faster, not become another thing to remember. Test it with a plain-text clipping before relying on it in a busy app.
4. Understand what each permission enables
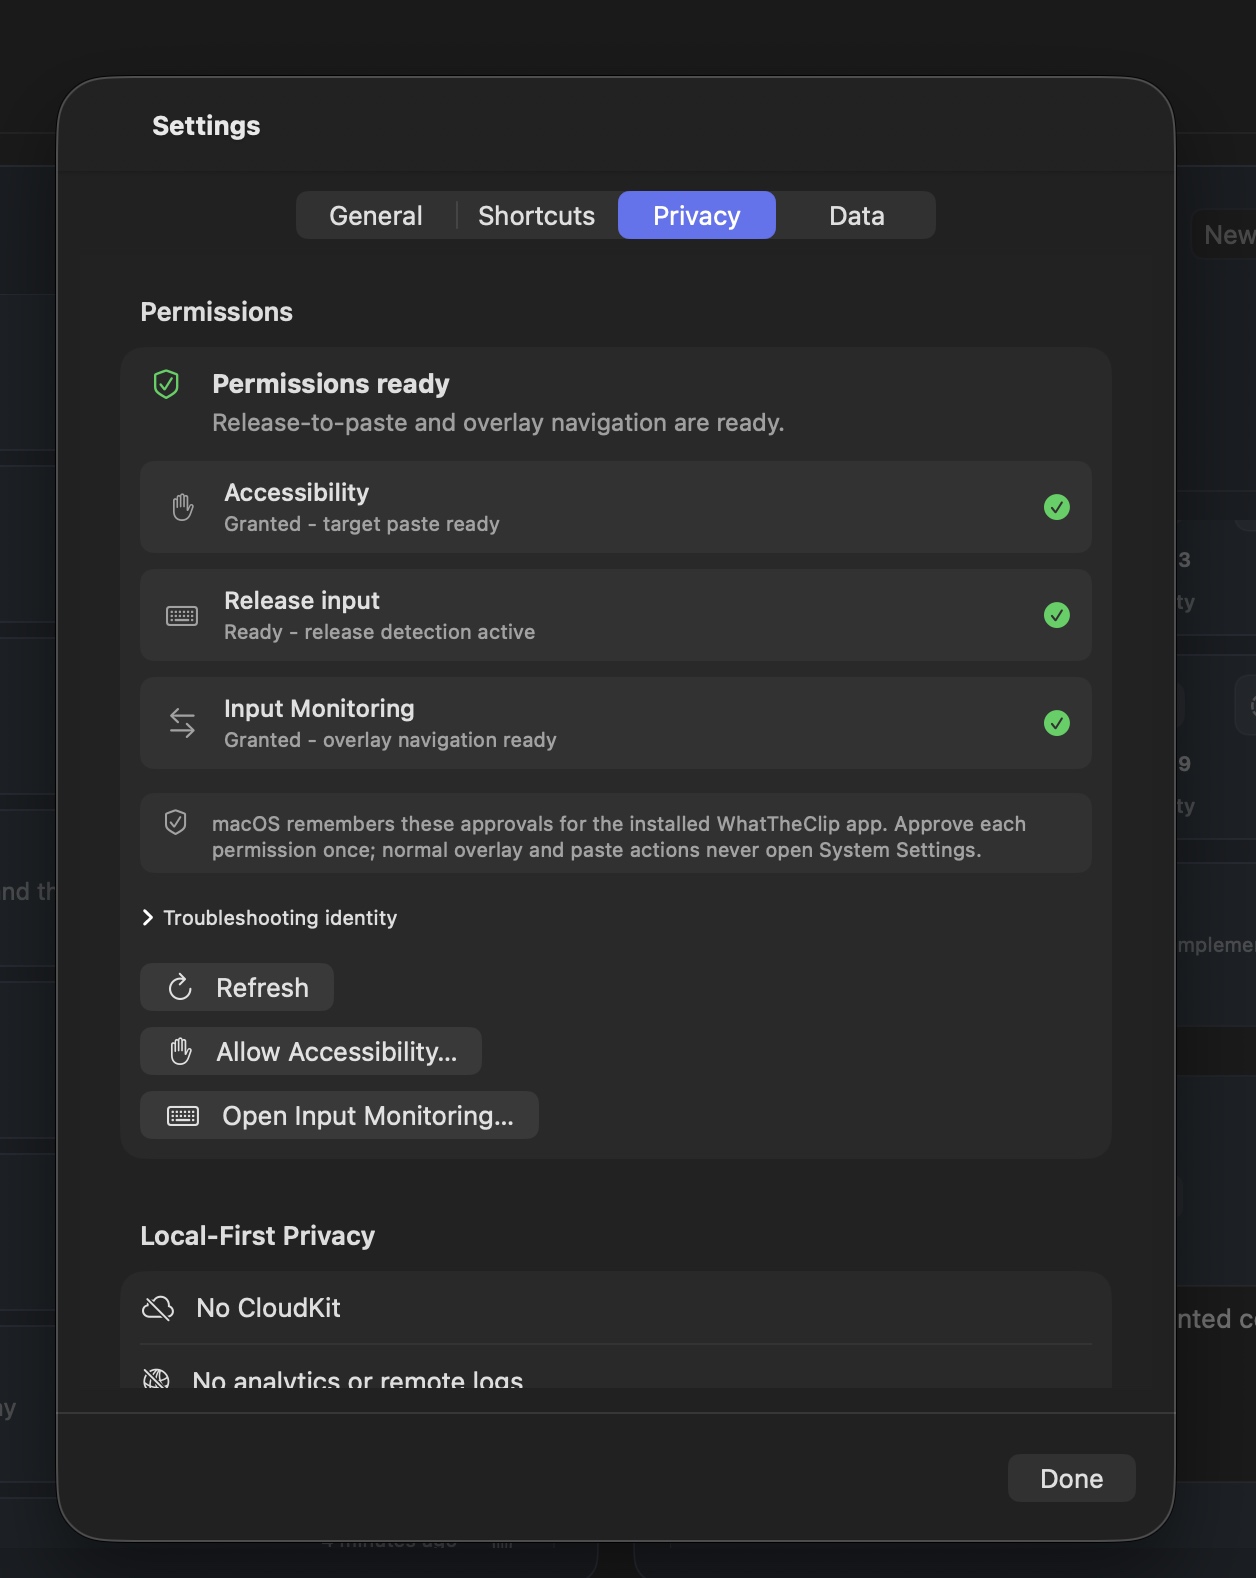
WhatTheClip keeps permission requests tied to a specific local action:
- Accessibility supports a user-triggered paste into the previous app.
- Input Monitoring supports global shortcuts and overlay navigation while another app is active.
- Release input confirms the shortcut-release behaviour required for the overlay workflow.
The app can still be useful without every permission. For example, if automatic paste is unavailable, a selected item can be copied and pasted manually.
Approve only what you need
Review the status in Settings before testing the full overlay path. macOS remembers approvals for the installed app, so avoid moving or duplicating the app after setup.
Read the Permissions Guide before granting access, and see the Privacy Policy for the local-first storage boundary.
Build confidence one layer at a time
It is tempting to switch on every option while you are setting up a new utility. With clipboard tools, that makes it harder to know what caused a problem. Start by confirming that harmless text appears in history. Then test the overlay. Then add a single favourite. Only after those steps feel normal should you enable the automatic paste path.
That order also makes the fallback understandable. If the destination app does not accept automatic paste, you can confirm the selected item is on the clipboard and use Command-V yourself. That is a useful result, not a failed setup—especially in a secure field, a remote desktop session, or an app with unusual focus rules.
When your first profile works, leave it alone for a few days. The best additions usually reveal themselves through repetition. A slot you use every morning is worth saving; a clever one-off is probably better left in recent history.
5. Use a saved favourite from the overlay
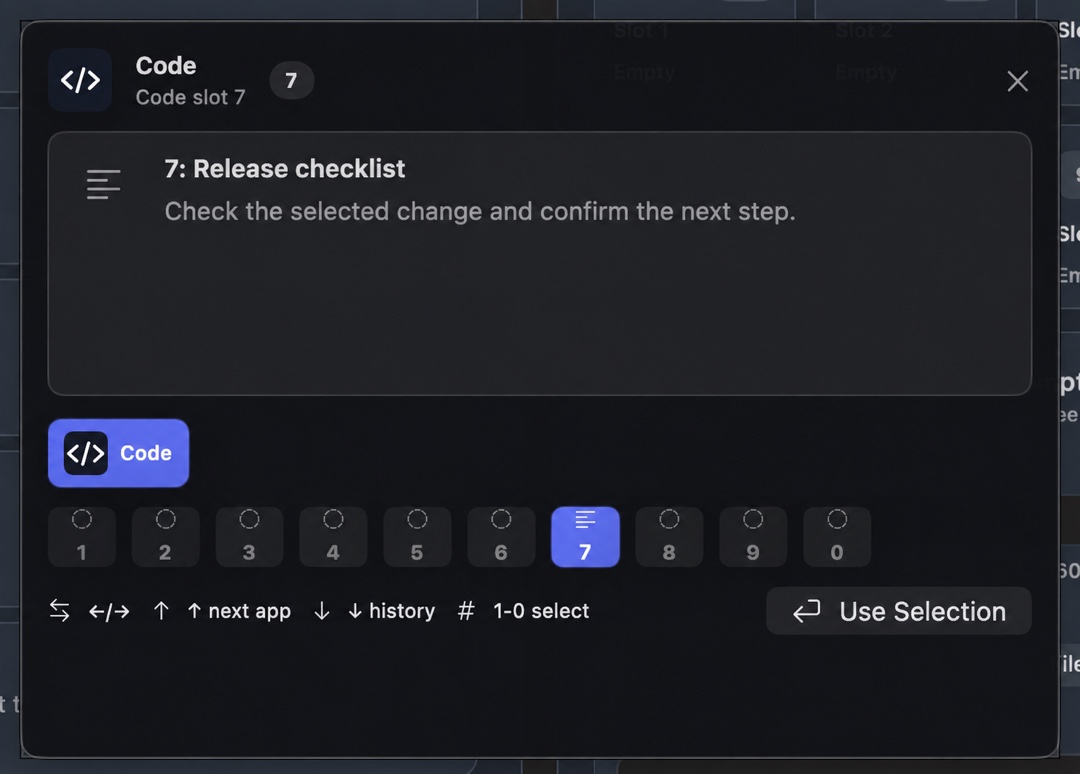
Once you have saved a repeated item, the overlay gives it a direct numbered route back into the task. Switch to the appropriate App Profile, choose its slot, read the preview, and select it only when it is the material you meant to use.
Confirm the favourite before you use it
The selected Code slot shows its name and preview inside the overlay. That gives you one last check before WhatTheClip returns the selection to the app you were using.
A simple first workflow
- Copy a harmless text phrase.
- Confirm that it appears in Clipboard History.
- Open the overlay and select that item.
- Verify the result in a simple text field.
- Create an App Profile only when you have a repeated item worth saving.
That sequence lets you learn the workflow without treating the product as an archive or granting more permissions than you need.